DECK FRAME 2
DECK FRAME : SIDES & TOP
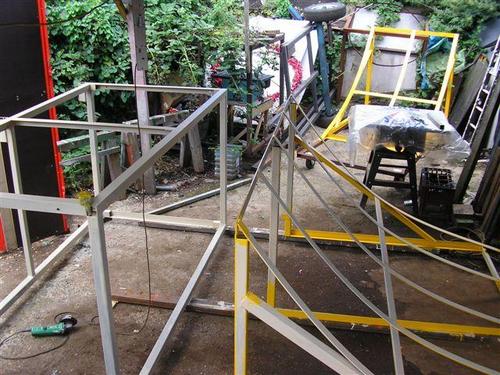
Keep referring to pic at bottom
2. UPRIGHTS
Lay out 4 lengths box, 4ft (1220mm). These will fit on top of the base, and below the upper frame, so to maintain the 4ft overall height, we need to subtract both those thicknesses. So our uprights will be:
1220mm (4ft) less 50mm top and 50mm bottom (100mm) = 1120mm.
TACK WELD each upright in place. Complete the welds after the upper frame has been welded on squarely.
3. UPPER FRAME
Layout one 8ft (2440) length boxLayout one 8ft (2440) length angle
Layout one 8ft (2440) length 50mm flat.
Layout two 4ft (1220) lengths box (*)
Again, lay these out on the floor, just the same as the base, and cut them to the same lengths. The long angle will be the front, and the flat will be the back of whatever ramp will be fitted.
Tack them square together, and drill two holes about 150mm from each end, and one about 100mm from the centre. This centre hole has to be offset, because it would foul when braces are put in if its smack in the middle. By drilling them together now, we know they will fit together later. Cut the tacks after marking the top side, and save the flat till later.
Square everything up and weld your top frame together. Lift this onto the four uprights, again square everything every way you can, and weld the lot together.
EXTRA BITS
4. BRACES
Cut 4 x 4ft lengths of angle. Weld three evenly spaced across the top of the frame, and one vertically in the centre of the back of the frame. These must fit flush with the existing surfaces, so that your ply panels fit smoothly when the time comes.
5. HANDRAIL BRACKETS
Cut two 200mm lengths 60 x 60mm box. Drill them right through in the centre with 13mm holes. These will be the fixing holes for the handrails. Weld the boxes vertically at each end of the rear main uprights, so the holes are at the side as you face the box.
CHECK SQUARE Not only because the ply you will be screwing to your frame is already precisely square, but also you have to fit the ramp to the deck, and the deck may be fitting to another adjacent deck, and it’s a hell of a job bolting them all down if they are slightly out of square.
TOP TIPS
Remember SQUARE IS CRUCIAL.
I found it useful to make up two rough squares out of 3ft corners of a sheet of ply, and use these to clamp each upright tight in place as I weld it.One of our finished assemblies comprised 8 separate modules, so the more bits you can build together, the better they will fit on site.
This basic module can be built lower to make funboxes, except for making the ends top rails out of drilled angle, so the 4ft wide ramps can be fitted to the ends, rather than a long side. It can be modified to make higher 5’ and 6’ ramps. We did it by using a standard 4’ quarter ramp, and fitting a matching sloping front to the deck module to the required height, as part of the ramp. You must remember though, that you will then have to make the deck module deeper to still provide a 4’ deep deck.
REMEMBER the ply needs to overlap the edge of the steel to cover the upright panels. Not only is this neater, but it protects the open edges of the ply.